Create a Testing Environment for your domain
Purpose: in some circumstances, you would like to
- conduct a WordPress upgrade/update test before live update
- run some plugin test before live installation
- run website recovery test (like us)
Requirements: you need to have
- a hosting resource (e.g. hosting account in some web hosting company), or
- a (cloud) VM in internet, or
- a VM/dedicated development server in your company local area network (LAN)
For VM/dedicated machine, you may need to setup web server (e.g. Apache) and database server (e.g. MySQL/MariaDB) on your own.
1. Setup Account
- You may order a hosting account (with you domain name) in some hosting company, or
- You have a LAMP VM or server, and already setup Apache/PHP/MySQL (or MariaDB)
(Be aware of PHP and MySQL version difference between live and testing environment)
2. Clone Your website to the testing environment
Copy both website files and database from production server to the testing environment
Be aware of the FTP hostname, MySQL connection, folder paths (i.e. settings inside wp-config.php)
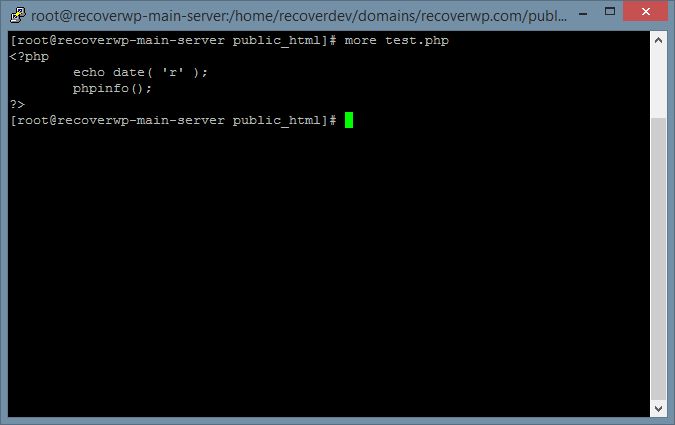
3. (Optional) you may upload a test.php to the testing environment, such that you can check your browser is accessing the testing server in step 6. The content of test.php may contain –
<?php
echo date( ‘r’ );
phpinfo();
?>
4. Get the testing website IP,
For web hosting account, you may ask your web hosting provider to get the website IP address
For Cloud/VM, it shall be your public internet facing IP address
For LAN server, it shall be your internal network address (probably 192.168.x.x , or 10.x.x.x)
5. Modify your computer hosts file
Login your Windows desktop with administrative account (e.g. Administrator)
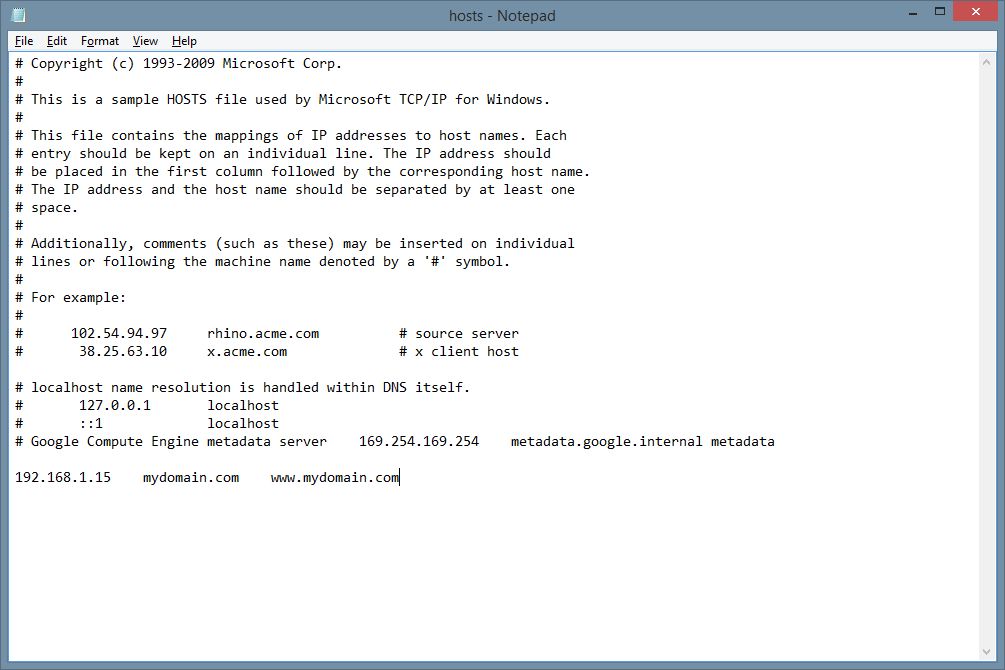
Use NotePad to open C:\Windows\system32\drivers\etc\hosts
Then, add a line –
a.b.c.d mydomain.com www.mydomain.com
(where a.b.c.d is your testing website IP address step 4)
Save it. Close all browsers (Internet Explorer, Edge, FireFox, Chrome, etc)
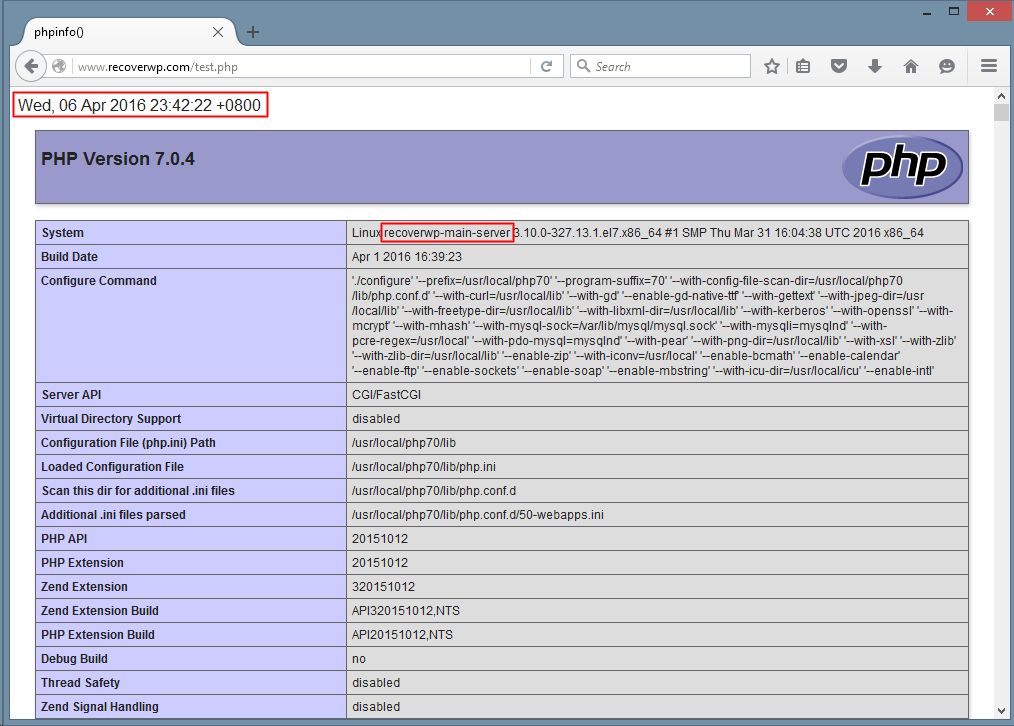
6. Re-open the browser, and visit www.yourdomain.com, you may press Ctrl F5 to force refresh it. It shall be connecting to your testing environment.
You can make use test.php (created in step 3) to verify your browser connection is correct or not.
(You may use the system date time and hostname for verification)
If OK, the testing environment is OK, and you can start your test.
Remember to remove the added line inside your hosts file after testing.
The above suggestion is on AS-IS AS-AVAILABLE basis. No any warranty/guarantee/support will be made.
About RecoverWP.com
RecoverWP.com is managed by web hosting professionals, who have been working on web hosting, WordPress website, security and vulnerabilities area since 2003.
Contact: (852) 3502-4863 | Email: support@recoverwp.com
Copyright 2015-2019 (c) Website Maintenance Service Limited


